The Docking processor will dock the vessel to the specified docking port on the target. It switches on NAV receiver (set to station port docking freq) and Docking HUD for the vessel. You have to open the nose cone yourself (although it is possible to dock with nose cone closed).
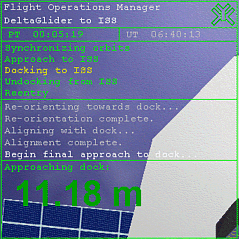
The docking is split into three different phases (placing the vessel on the docking axis, orienting towards dock and rotational alignment and final approach to dock.
It can (rarly) happen that the vessel is "crossing through" the station while approaching the hold position. Since there is no crash detection, this mis-behaviour causes no problems.
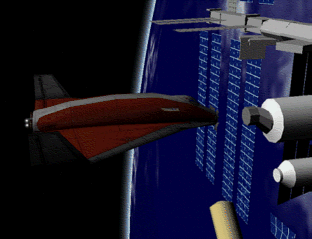
The below image shows the vessel just seconds away from "... we have capture ..."
<Step>
<Label>Docking to station</Label>
<Processor type="Docking" mode="Lock">
<Var name="Reference"> ISS </Var>
<Var name="Port"> 2 </Var>
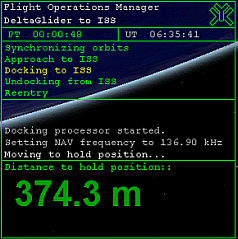
<Var name="HoldDist"> 300 </Var>
<Var name="Cmds"> K,^C </Var>
</Processor>
</Step>
mode="Lock" means the docking processor is going to
dock our vessel to the defined target (the other mode is used in the
next phase when we undock).Reference defines the target we will dock with.
Port is the id of the target port we will dock to. REDSHIFT will automatically set the NAV1 frequency to the NAV frequency of the port and switch the HUD mode to DOCK.
HoldDist specifies the distance of the hold position to the docking port. The hold position the point on the docking axis, where the vessel re-orients towards the dock.
Cmds is a (currently ignored) list of commands for the vessel (opening the nose cone, requesting docking clearance).